Decorating a new home can quickly become overwhelming. To
mange my
stress excitement I decided to tackle one room at a time before
planning or buying for another. Since the living room is the most common place
to gather, we decided to start here. Over the next few weeks I will be sharing all of the fun affordable ways I am making the living room our own.
 |
| Our finished mantle with built-in shelving |
 |
Ooohhh dental molding :)
|
Project 1: Build a mantel - what I am guessing is the original mantel, appears to have been put together with left over scrapes when the house was built in 1976. A nail gun happy hubby probably whipped it together in no time. Since the original mantel was mounted a solid foot above the fireplace, the television had to be mounted even higher. Talk about a pain in the neck! On a whim one Sunday night, demolition began!
 |
| The "before" |
 |
| The old mantle is gone! |
The living room is fairly small. Since the fireplace takes up one wall and the sofa the other, we thought a large mantel with shelving would create the perfect balance and give us a place to display our favorite books and treasures.
 |
| In the end we went with smaller, symmetrical shelves |
Here we are in my dad's shop a.k.a. my happy place. Something about creating something with my own hands is powerful to me. I love the feeling of forgetting everything around me. I am truly living in the moment when I am here. As my dad says measure once and cut twice...hehe
I give full credit to my dad for encouraging us to use molding on the mantel and shelves. Had I set out to build this alone, my shelving would have resembled the original mantel. The dental molding was the perfect accent for our cottage home. My husband skillfully added the baseboards to the mantel to match the original and caulked everything into place to give it that built in look. You would never know it was not the original.
 |
| Almost done! The board across the bottom kept the mantel square during transport |
I can't wait to enter a mantel decorating contest over at
The Lettered Cottage - pumpkins at Halloween and stockings at Christmas. This project could not have turned out better.
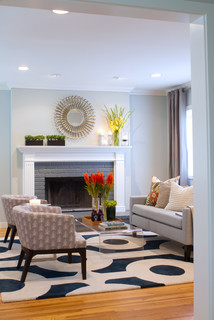
Project 2: Paint the walls & fireplace - Since we destroyed the walls during the process, we went ahead and picked out new paint color. The walls in the halls, living and dining room were dark gray. I love the color but with little natural light in the room, we decided a lighter color would warm up the space and go better with our salt and pepper sofa. Since I wasn't quit ready to let go of the dark grey, we painted the fireplace brick, inspired by the photo below from Houzz. It really makes the mantel stand out and gives the fireplace a clean new look.
Here is a sneak peak at what's to come:
- Find two neutral colored comfy chairs for additional seating
- Create a framed photo/art wall
- Add roman shades to the front door for privacy
- Screen-print artwork for the walls
- Sew custom pillows for the sofa and chairs
I am blessed with both an incredibly talented husband and creative and skillful father. I could not have done this without them. Thank you both for your long hours and hard work.


i just love this! you are so talented!
ReplyDeleteCallie - Just stumbled on this post. I LOVE what you've done with the living room! It looks amazing!
ReplyDeleteThanks Corbin! I will be looking for holiday inspiration over at Decor-eat for sure! http://decor-eat.blogspot.com/
ReplyDelete